Wednesday, December 31, 2008

Saffron-Scented Pear Upside-Down Cake


Pears + Saffron + Ginger = Heaven

And, this cake is really easy to make.

Ingredients

Vegetable oil cooking spray
Pinch of saffron threads
1 cup sugar
1/4 cup (1/2 stick) unsalted butter, softened
2 Comice pears, (6 to 7 ounces each)
1 1/3 cups all-purpose flour
1 1/2 teaspoons baking powder
1/2 teaspoon ground ginger
1/2 teaspoon salt
3/4 cup nonfat buttermilk
1/4 cup vegetable oil
2 large eggs
1 teaspoon pure vanilla extract
2 tablespoons finely chopped crystallized ginger

Note: I couldn't find nonfat buttermilk, so I used low fat. It worked fine.

Directions

Preheat oven to 350 degrees. Coat an 8-inch square or round cake pan with cooking spray. Line bottom with parchment paper, and set aside.

Pulse saffron and 1/4 cup sugar in a spice grinder until well combined. Put butter and saffron sugar into the bowl of an electric mixer fitted with the paddle attachment. Mix on medium-high speed until pale and fluffy, about 3 minutes.

Spread the mixture into the bottom of the prepared pan. The recipe suggests using a rubber spatula, but I found a spoon to be easier to spread it.


Whisk together flour, remaining 3/4 cup sugar, the baking powder, ground ginger, and salt in a large bowl.

Whisk buttermilk, oil, eggs, and vanilla in another bowl.

Add buttermilk mixture to flour mixture in a slow, steady stream, whisking. Stir in crystallized ginger.

Peel pears; halve lengthwise, and core. Using a mandoline or a very sharp knife, cut pears lengthwise into 1/4-inch-thick slices. Arrange pears decoratively in pan over saffron-butter mixture. Only the first layer has to be laid down decoratively. You won't even see the pears underneath the top layer, so I just piled them in.


Spread batter over pears. Bake until set and a cake tester inserted into center comes out clean, 40 to 45 minutes. Let cool 5 minutes.

Place a serving platter upside down over pan; flip to unmold cake. Peel off parchment.

The butter and sugar and saffron seep into the cake, making a delicious glaze on the top.

And voila! The finished cake. It's absolutely delicious.

Monday, December 29, 2008

Collard Greens with Walnuts and Pickled Apples

This is a belated post on a dish I made a couple weeks ago, when my CSA box contained collard greens and apples. I had never tried collard greens before, and found this recipe on Epicurious and thought I would give it a try.

The recipe was essentially a salad, and the collard greens were raw. I didn't realize this until halfway through my preparation, at which point, I tried a nibble of raw collard greens and realized that they really don't taste good raw. Maybe some people like them, but I don't. So, I decided to try wilting them a bit, but keeping the basic flavors of the recipe. That worked, and my husband really liked it, but if I were to do it again, I'd cook them down a little more than I did because they were just too raw tasting for me.

The flavors are excellent though, and really unique. So, I recommend trying this, but adjusting the cooking time based on your personal preference for the green. I think this would be really good with chard or even spinach as well.

Ingredients

2 red apples such as Gala or Idared
1/2 cup cider vinegar
1 cup water
1/2 cup sugar
1 teaspoon salt
1 teaspoon pickling spice
1/2 cup walnut halves (3 ounces)
1/4 cup olive oil
1 bunch collard greens (1 pound)
1/2 teaspoon kosher salt
1 shallot, finely diced (this is my own addition)

Note: I didn't have any pickling spice so I used a half a teaspoon mustard seeds, a bay leaf, a pinch of cinnamon, a couple of cloves, and salt & pepper. There's a bunch of different suggestions for pickling spice combos online, so if you don't feel like buying a jar of it, you can google for ideas.

Directions


Pickled Apples


Quarter and core apples, then cut each quarter lengthwise into 1/8-inch-thick slices. Boil vinegar, water, sugar, salt, and pickling spice in a saucepan, stirring, until sugar is dissolved. Add apples and return to a boil. Transfer to a heatproof bowl and cool. Chill, uncovered, until cold, about 1 hour.

Walnuts


Coarsely chop 1 tablespoon nuts and finely chop remaining nuts. Toast walnuts in olive oil in a small skillet over moderate heat, stirring occasionally, until a shade darker. Cool nuts in oil.

Collard Greens

Halve each collard leaf lengthwise with kitchen shears or a sharp knife, cutting out and discarding center ribs. Stack leaves and cut crosswise into 1/4-inch-wide strips.

To Assemble

Here's the part I made up. Heat 1-2 tablespoons of the walnut infused oil in a large saute pan. Add the finely chopped shallot and saute for a couple minutes, until the shallot is soft and starts to brown.

Add the remainder of the oil and the walnuts, then add in all of the collard greens. Add water...about a quarter of a cup to help braise the greens. Cook for a few minutes, until the greens are soft enough for your liking.


Strain the pickled apples. When the collard greens are just about done, add the apples. Stir together and add salt and pepper, if needed.


Sunday, December 28, 2008

Cranberry Vanilla Coffee Cake

This delicious little cake from Gourmet, via Epicurious, has been all the rage on the food blogs lately, it seems. It sounded so good, and I thought it would be a wonderful Christmas morning breakfast. Unfortunately, as I discovered earlier this fall, cranberries are in short supply out on the west coast. After checking at several stores, all of whom said that they stop carrying cranberries in November, I found a small, overpriced pint of them at the fabulous Ferry Building on Christmas Eve. They were $6, but I didn't care. Cranberry vanilla coffee cake would be mine.

The recipe is easy and absolutely delicious. It's not too sweet and it smells heavenly.

Ingredients

1/2 vanilla bean, split lengthwise
1 3/4 cups sugar
2 cups fresh or thawed frozen cranberries (6 ounces)
2 cups plus 1 tablespoon all-purpose flour, divided
2 teaspoons baking powder
3/4 teaspoon salt
1 stick plus 1 tablespoon unsalted butter, softened, divided
2 large eggs
1/2 cup whole milk

Note: I actually used an addition splash of milk...probably about 2 tablespoons worth. The batter seemed incredibly sticky and it just wasnt' absorbing all the dry mixture. You may find you need to do the same. Also, while the recipe calls for a 9 by 2 cake pan, I think I will do this in a spring form pan the next time I make it. It would probably make the cake easier to remove.

Directions

Preheat oven to 375°F with rack in middle. Generously butter a 9- by 2-inch round cake pan. Line bottom with a round of parchment paper and butter parchment.

Scrape seeds from vanilla bean into a food processor with tip of a paring knife (reserve pod for another use if desired). Add sugar and pulse to combine. Transfer to a bowl.

Pulse cranberries with 1/2 cup vanilla sugar in processor until finely chopped (do not purée).

Whisk together 2 cups flour, baking powder, and salt.

Beat together 1 stick butter and 1 cup vanilla sugar in a bowl with an electric mixer at medium-high speed until pale and fluffy. Add eggs 1 at a time, beating well after each addition. Scrape down side and bottom of bowl. Reduce speed to low and mix in flour mixture and milk alternately in batches, beginning and ending with flour, until just combined.

Spread half of batter in pan, then spoon cranberries over it, leaving a 1/2-inch border around edge. Top with remaining batter and smooth top. This was the trickiest part because the batter is thick and hard to spread. I just dollopped it on in small spoonfuls all over the cranberries and gently spread the dollops together with a spoon.

Blend remaining 1/4 cup vanilla sugar with remaining tablespoon each of butter and flour using your fingertips. Crumble over top of cake.

Bake until a wooden pick inserted into cake (not into cranberry filling) comes out clean and side begins to pull away from pan, 45 to 50 minutes. Cool in pan 30 minutes, then remove from pan and cool completely, crumb side up.

Tuesday, December 16, 2008

The most bizarre combination of ingredients ever


When I lived in Washington, there was this local chain, Lebanese Taverna, that had this one amazing dish...consisting of either chicken, lamb, or eggplant, served with yogurt, chickpeas, pomegranates, and tons of garlic. It was to die for.

There is no Lebanese Taverna in Berkeley, and I had a craving. Through the magic of the internets, I was able to hunt down a recipe for this dish. The recipe I used was posted by a poster on the Chowhound boards. I improvised a little, so I'll try to describe it the way I did it. And while I used a whole chicken as the recipe suggested, next time I will just use boneless chicken pieces, which will make preparing this a lot easier. Or perhaps I'll try lamb or a vegetarian version with eggplant.

While not exactly like Lebanese Taverna's, this version was still really, really good. I'll definitely make this again.

Fatteh Bel Djaje

For chicken and broth:
1 chicken, quartered (or 2-2.5 pounds or so of boneless chicken pieces)
1/2 lemon, cut into quarters (I used half an orange)
1 Tb ground cinnamon
1 tb salt
2 cups water (I needed a little more water to cover everything in the pot)
1 onion with 3 cloves stuck in it
1/4 tsp nutmeg
1/2 stick cinnamon
2 bay leaves
1 large can chickpeas

For serving
1 quart plain yogurt (i use labneh or the thick greek yogurt, they work best)
4 cloves garlic, crushed
1 cup mints leaves, torn
1 cup pine nuts
3 Tb butter
2 pita breads cut into 1 inch squares
1/2 a pomegranate (if available)

Rice or couscous, for serving, if you want.

First, mix the yogurt with garlic and a pinch of salt and let it sit for at least 15 minutes. I'd keep it out of the fridge so it can come to room temperature.

Brown the chicken in a large large dutch oven or stockpot. Add lemon or orange, ground cinnamon, salt, water, onion with cloves, nutmeg, cinnamon stick and bay leaves. If you are using boneless chicken in small chunks, you can probably just leave it on the stove to to simmer. If you are using bigger pieces with the bone in, bring the water to a boil and put it in a 350 degree oven for 20-30 minutes, depending on how big the pieces are.


Once the chicken is cooked, remove it from the broth. Let it cool if you need to debone it. Strain and skim broth, pour over chickpeas and cook for 15-20 minutes. I reserved a little bit of broth and poured it back over the deboned chicken, covered it, and simmered on very low heat to keep it warm.

Cook the rice or couscous, if you are using it. (I used basmati rice, which works well with this.)

Fry pine nuts in 1 tb butter until brown.

Set them aside and fry the pita cubes in remaining butter until crisp.

To serve

Put rice or couscous in a shallow bowl. Top with chicken, chickpeas and a couple tablespoons of broth, and the yogurt mixture. Sprinkle the pine nuts, pita, mint, and pomegranate on top.

And convince people that despite the odd ingredient list, it is actually an incredibly delicious meal. The pomegranate seeds add sweetness, the pine nuts and pita are crunchy, the mint makes it fresh and bright, and all of them compliment the spicy chicken and garlicky yogurt beautifully.

Saturday, December 13, 2008

I embark on a labor of love

Good god.

I had a holiday party to go to and wanted to make Christmas cookies for it. I was torn, however, between making really delicious cookies and making really beautiful cookies.

Then, this piece about Zimtsterne, the German meringue-like Christmas cookie,popped up on my blog reader, prompted me to seek out a recipe, and I realized I could have the best of both worlds.

While the end result does indeed live up to that goal, it did not happen without a lot of hard work, patience, and cursing.

Thankfully, they taste amazing and while not flawless, still pretty damn beautiful. They taste unlike any Christmas cookie I've ever had. They are both crunchy and soft, and have such a wonderful flavor. Once I got the hang of it, they got a little easier, but they do take a long time (particularly if you want the Martha-esque frosting and almond topping). If you are patient and ambitious, I highly recommend attempting these things. Or if you really want to make a gluten-free holiday dessert and are a glutton for pain.

Inspiration from these recipes comes from David Lebovitz, and the recipe used comes from the Food Network. I've changed the directions significantly, based on other information I read online before embarking on this project (many from the Food Network commenters) and my own trial and error attempts to make these cookies.

Ingredients

2 1/4 cups confectioners' sugar
Lots of granulated sugar for rolling
15 ounces sliced almonds, with skin (about 4 1/2 cups)
1 1/4 teaspoons ground cinnamon
3 large egg whites, room temperature
2 teaspoons finely grated lemon zest

The one nice thing about this recipe is that it's very forgiving, flexible dough. I could see using other spices or other nuts in the mixture, so I think you could adapt this based on preferences and what you have in the cupboard.

While the recipe calls for lemon zest, I used orange zest. It seemed more holiday-like to me. This was a good choice. The cookies are more cinnamon-orange flavored than almond flavored, so I think if there were lemon there, they might taste a little strange. A couple other recipes online used either Kirsch or brandy in place of the zest. I think those would be good too, particularly because it would be good to have alcohol on hand for when you are ready to throw the dough out the window. Vanilla extract would probably work well too, though you'd lose the nerve-soothing qualities of something more alcoholic.

Also, the Food Network recipe called for confectioners' sugar for rolling. Don't even think about it. Use granulated. Other recipes online were split between the two sugars and when the confectioner's sugar was giving me trouble, I switched to granulated and this became much, much easier.

Directions

The first thing I did, since I'm OCD, is sort through the almonds to find nicely shaped ones to use for decorating the cookies. I don't know if all sliced almonds are as broken and chipped as mine were, but I wanted perfect cookies, so I painstakingly combed through my almonds to make sure I had enough perfectly shaped ones to use for the tops. Skip this step if you aren't insane.

Ugly Almonds for grinding


Pretty almonds for decorating

Sift the confectioners' sugar. Put 1/2 cup of the sifted confectioners' sugar, 10 ounces (3 heaping cups) of the almonds and all the cinnamon in a food processor. Process until the nuts are finely ground, with just a few larger pieces.

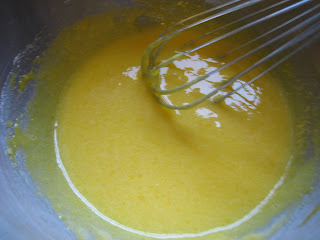
Whip the egg whites in a large, clean bowl with an electric mixer on high speed until they hold soft peaks, about 1 minute. Gradually add the remaining confectioners' sugar while whipping, until the whites are thick, creamy and somewhat stiff, about 2 minutes more. Set aside 2/3 cup of this meringue for topping the cookies.

Fold the ground almond mixture and the lemon zest into the remaining meringue to make a stiff dough. The dough is going to look chunky and weird. Don't worry.


Divide in into two portions, wrap it in plastic wrap, and stick it in the freezer for at least 30 minutes, though longer won't hurt it.

Now the easy part is over.

The recipe recommends laying parchment or wax paper down to roll the dough out. I didn't have any, and frankly, I'm not sure it would make a difference. Instead, dump a handful of granulated sugar down on the counter (or the paper, if you want to use it), and spread it out, like it was flour and you were making normal, sane people cookies.

Take one of the dough balls out of the freezer and put it down on the work surface. Keep the plastic wrap and put that over the dough to roll out (actually, here I think wax paper probably would be helpful). Roll the dough until it is about 1/4-inch thick. I found it helpful to keep turning and lifting the dough, and adding more sugar beneath it whenever I thought it was sticking to the counter. As I said before, it's forgiving, so if you tear it, you can just roll it back together.
Cut cookies with a 3-inch star cutter and place about 2 inches apart on prepared baking sheets.

Cutting the cookies is also a pain. Don't do this:


You will never be able to get them off the counter.

Instead, cut one star, use a butter knife to get underneath it, and carefully move it to the cookie sheet (greased or lined with parchment) and poke it through the cookie cutter onto the cookie sheet.

Keep a bowl of lukewarm water handy and rinse your cookie cutter off every couple of stars.

The saving grace in all of this is that excess dough can be rerolled, over and over again. I just would put it back in the freezer for 5-10 minutes before doing it because it does make things much easier.

Preheat the oven to 250 degrees F. Line 2 baking sheets with parchment paper or silicone baking mats, or just grease them.

At this point, I stopped taking pictures because I was covered with sugar and getting kind of cranky.

Use a small spoon, brush or offset spatula to spread the reserved meringue over the top of each cookie, taking care not to let the meringue drip over the sides. I used that weird-shaped butter knife thing that comes in most cutlerly sets. That worked well, since it has a little point to it, making it easy to spread the frosting on the star points. It still takes forever though, and then you get to painstakingly press remaining sliced almonds in a decorative pattern into the meringue.

See? Total labor of love.

You could also just grind up more almonds and sprinkle those on the meringue. Or save yourself the headache, and leave the meringue plain.

Bake cookies until bottoms are light golden brown and meringue is set and crisp, about 30 minutes. (Adjust this time based on the size of the cookie cutter. Food Network recommended 30 minutes for a 3 inch cutter. I did it for 20 minutes with my 2 inch cutter.) I think this is an area where you can use your judgment. Cook them the maximum time if you want them crispy, cook them for less if you want them chewy. I'd just keep an eye on them. When they are done, turn off the oven and open the oven door to release heat and dry cookies out in the oven for 10 more minutes.
And there you have it.

Friday, December 12, 2008

Parmesan-Black Pepper Biscotti


I love these.

They are savory, salty, crunchy, and perfect with wine. Being that they are biscotti, they last for a while, so they'd be great for gift giving. The recipe also makes a lot...about 5 dozen or so. I've made them a few times, and they are usually a hit.

They are pretty easy to make, but you do need to stay near your oven and set the timer numerous times.

The recipe comes from Epicurious.

Ingredients
1 1/2 tablespoons whole black peppercorns
4 cups all-purpose flour plus additional for dusting
2 teaspoons baking powder
2 teaspoons salt
4 1/2 ounces Parmigiano-Reggiano, finely grated (2 1/4 cups)
1 1/2 sticks (3/4 cup) cold unsalted butter, cut into 1/2-inch cubes
4 large eggs
1 cup whole milk

Directions
Put oven racks in upper and lower thirds of oven and preheat oven to 350°F.
The recipe suggests putting the peppercorns in a coffee or spice grinder and grinding until coarse. I don't have a spice grinder, and I didn't feel like finding peppercorns in my coffee the next morning, so I just put them all in a plastic sandwich bag and banged the hell out of them with a hammer. You wind up with something a little chunkier than "coarse" but I prefer it that way. I love pepper, and I like being able to see the peppercorns in the biscotti.

Whisk together flour, baking powder, salt, 2 cups cheese, and 1 tablespoon ground black pepper in a large bowl. Blend in butter with a pastry blender or your fingertips until mixture resembles coarse meal. Whisk 3 eggs with milk and add to flour mixture, stirring with a fork until a soft dough forms.

Turn dough out onto a lightly floured surface and quarter dough. Using well-floured hands, form each piece into a slightly flattened 12-inch-long log (about 2 inches wide and 3/4 inch high).
Transfer logs to 2 ungreased large baking sheets, arranging logs about 3 inches apart.


Whisk remaining egg and brush some over logs, then sprinkle tops of logs evenly with remaining 1/4 cup cheese and 1/2 tablespoon ground pepper.
Bake, rotating sheets 180 degrees and switching position of sheets halfway through baking, until logs are pale golden and firm, about 30 minutes total.
Cool logs to warm on sheets on a rack, about 10 minutes.

Reduce oven temperature to 300°F.

Carefully transfer 1 warm log to a cutting board and cut diagonally into 1/2-inch-thick slices with a serrated knife. Arrange slices, cut sides down, in 1 layer on a baking sheet. Repeat with remaining logs, transferring slices to sheets.


Bake, turning over once, until golden and crisp, 35 to 45 minutes total. Cool biscotti on baking sheets on racks, about 15 minutes.

And that's it. They'll stay fresh in an airtight container for a couple weeks.

A very belated note on my Thanksgiving

I have been wanting to make this post for a while, but haven't had a chance. Better late than never.

My Thanksgiving was wonderful, but I wanted to highlight one recipe in particular. Martha Stewart's bay-leaf infused champagne cocktail was absolutely wonderful. They were incredibly easy to do, and a good way to make very cheap wine special and delicious.


Ingredients
1/2 cup granulated sugar
1 cup water
2 dried bay leaves
2 bottles sparkling rose, preferably cava
4 blood oranges, cut into segments

I didn't add the oranges because I forgot about them. For wine, I used a $6 bottle of rose cava from Trader Joe's.

Directions
Bring sugar and water to a boil, stirring until sugar has dissolved. Remove from heat, add bay leaves.

The recipe suggests leaving the bay leaves in for 20 minutes. The syrup didn't really have much of a bay taste or scent at that point, so I just left the bay leaves in overnight. I figured I could always redo it the next day if it was too strong. It wasn't - it was perfect. So, I suggest leaving it in as long as you'd like.

Pour 2 teaspoons syrup and 1/2 cup rose into each of 16 glasses, and stir. Garnish with orange segments.

And that's it. Really easy and really festive.

Wednesday, November 26, 2008

Happy Thanksgiving!

Since I probably won't be doing much food photography while preparing Thanksgiving dinner, I thought I'd just share my menu.


My husband and I are hosting a small Thanksgiving dinner - just his mom and a family friend. On the menu:


Cheese, crackers, and sliced persimmon from our farm share


Brined Turkey
A friend of ours made this for us last year and it was incredible. The recipe comes from Emeril Lagasse of the Food Network. We've never brined a turkey before, so this ought to be interesting.


New England Sausage, Apple, and Dried Cranberry Stuffing
From Epicurious. We've made this a few times now for Thanksgiving. It's wonderful.


Mashed Potatoes with Parsnips
Another item served up to us by friends. They made it with 3 potatoes and 6 parsnips, plus butter and a bit of half and half.


Green Beans
We'll keep those simple.


Candied Cranberry Sauce
It's from Food and Wine. The cranberries get cooked in a skillet with minimal water, so they stay whole. I've never made it, but it sounds good.


Pumpkin Pie with Gingersnap Crust, whipped cream, and candied pepitas
The pumpkin pie and pepitas come courtesy of Martha Stewart. The gingersnap crust idea came from the blog Martha Stewart Baking at Home. I love anything ginger, and the pepitas just look like a fun addition.

To drink, I'll be serving up some of these cocktails from Martha Stewart, made with rose cava and bay-infused simple syrup. We'll probably pop open a nice bottle of white from one of our recent trips to Napa.


And that's dinner. Hope everyone has a happy Thanksgiving!

Tuesday, November 25, 2008

Amazing Fall Gnocchi

I randomly stumbled upon Liz's Cooking Blog, where she had a divine looking recipe consisting of gnocchi, butternut squash, sage, and pine nuts. I had all these ingredients on hand the other night, plus I had bacon that I needed to use up. I decided to toss that in too. The result was to die for. Really. I want to make this weekly, it was that good.

Ingredients

1 medium butternut squash
4 cloves garlic, minced
Olive oil
Salt and pepper
Fresh sage leaves
1 package gnocchi
3/4 cup pine nuts, toasted
Grated Parmesan

The original recipe called for an onion, which I didn't bother with, but I did up the garlic a bit. I probably used fewer pine nuts too.

Directions

Heat the oven to 375°. Cut the butternut squash in half and scoop out the strings and seeds the middle cavity. Flip the squash halves upside down and peel them. Cut the squash into 1-inch cubes. Toss with the garlic, a drizzle of olive oil, and salt and pepper. Mince about half of the fresh sage leaves and also toss with the squash.

Spread the squash mixture in a thin layer on a large baking sheet and roast for about 40 minutes or until the squash is soft.


As the squash finishes roasting, chop the bacon into one inch strips and fry in a deep skillet. Once the bacon starts getting crispy, push it to one side of the pan and toss whole sage leaves into the oil. Fry for about a minute, then turn the heat down to low and mix into the bacon. If there is too much oil in the pan at this point, drain off a couple tablespoons.


Remove the butternut squash from the oven and add to the bacon and sage mixture.

Heat salted pasta water to boiling and cook the gnocchi. Before draining the gnocchi, spoon a couple tablespoons of the water into the bacon and squash mixture and stir it, deglazing the pan.
Drain the gnocchi and set aside.

With the heat still on low, add the gnocchi to the bacon and squash mixture. Mix together and add the pine nuts. Serve with grated parmesan cheese.

Monday, November 24, 2008

Apple Cupcakes with Brown Sugar Buttercream

Yum.

These cupcakes were so good. They are pure Martha Magic. They are not too sweet and incredibly moist. They taste like apple cider. The buttercream works perfectly with them, though they would probably be good on their own with just a dusting of powdered sugar.

To Make the Cupcakes
Makes 2 Dozen

Ingredients
2 1/4 cups all-purpose flour
1 teaspoon baking soda
1 teaspoon baking powder
2 teaspoons ground cinnamon
1/2 teaspoon ground nutmeg
1 teaspoon salt
1/2 cup (1 stick) unsalted butter, softened
2 cups sugar
2 large eggs
1 teaspoon pure vanilla extract
4 cups coarsely shredded apples, such as Macintosh (about 1 3/4 pounds)

I highly recommend shredding the apples first, then cleaning up before you do anything else. I shredded them while the butter and sugar were mixing and my kitchen looked like an orchard threw up on it. Even though I shredded the apples in my Cuisinart, the sticky juice and stray apple shreds got everywhere. While it won't affect the cupcakes, its better for your sanity.


Directions

Preheat oven to 350 degrees. Line 2 standard muffin tins with paper liners; set aside.

Whisk together flour, baking soda, cinnamon, nutmeg, and salt in a medium bowl; set aside.

Put butter and sugar into the bowl of an electric mixer fitted with the paddle attachment; mix on medium-high speed until pale and fluffy, about 5 minutes. Mix in eggs and vanilla. Reduce speed to low; mix in apples.


Add flour mixture; mix, scraping down sides of bowl as needed, until just combined.


Divide batter among lined cups, filling halfway; bake until tops are springy to the touch, 18 to 20 minutes. Actually, I filled mine more than halfway, but they still came out normal height. Maybe my muffin pans are smaller than Martha's. I'm not really sure.

Remove cupcakes from tins; transfer to a wire rack; let cool completely.


To Make the Buttercream
Makes about 4 cups

Ingredients
4 large egg whites
1 cup packed light-brown sugar
1/4 teaspoon salt
1 1/2 cups (3 sticks) unsalted butter, room temperature, cut into tablespoons


In a heatproof bowl set over (not in) a pan of simmering water, whisk together egg whites, sugar, and salt. Cook, whisking constantly, until the sugar has dissolved and the mixture is warm to the touch.


Transfer to the clean bowl of an electric mixer. Beat on medium speed until fluffy and cooled, about 15 minutes. Raise speed to high; beat until stiff peaks form.

Reduce speed to medium-low; add butter, 2 to 3 tablespoons at a time, until fully incorporated.

This is where I started having problems. I've never made buttercream before, so I didn't realize how tempermental it could be. I learned after the fact that you can overwhip it, causing it to overheat and separate. Apparently if this happens, you can chill it and try rewhipping it. I didn't do this, because it tasted fine. It just was slightly lumpy and not as smooth and pretty as Martha's.

See?

If you see lumps, it is not butter that hasn't been fully incorporated. So stop whipping.

In any event, it still tasted fine, so I frosted the cupcakes. And to try to disguise the lumpy frosting, I sprinkled some pretty fall colored sugar on them. I definitely recommend storing these in the fridge because the frosting won't really hold up otherwise. You can let them come to room temperature before eating them though.

Sunday, November 23, 2008

Marbelized Lemon Tart with Sage Cornmeal Crust


As you know by now, I'm obsessed with putting herbs in desserts. And who doesn't love lemon tarts? Sage makes it seasonal. Though I'm sure this recipe would be equally good with rosemary or thyme.

The recipe comes from Martha Stewart. It's somewhat involved, so if you want to make it, plan ahead. I'll definitely make it again, but with two changes. First, I would not use coarse ground cornmeal, but something more finely ground. The crust had a nice flavor, but it was too grainy with the larger cornmeal flecks in it. Second, I would add a bit more sage. The flavor was there, but it wasn't very pronounced. Another teaspoon or two would do the trick.

Sage Cornmeal Crust

Makes enough for two 9-inch tarts

Ingredients

2 1/4 cups all-purpose flour, plus more for work surface
3/4 cup coarse yellow cornmeal (Don't do it! Use medium or finely ground.)
3 tablespoons sugar
1 tablespoon plus 1 teaspoon finely chopped fresh sage (more if you'd like a stronger sage taste)
1 1/2 teaspoons salt
1/2 teaspoon finely grated lemon zest
3/4 cup (1 1/2 sticks) cold unsalted butter, cut into small pieces
3 large egg yolks
5 tablespoons ice water

Directions

Pulse flour, cornmeal, sugar, sage, salt, and lemon zest in a food processor until combined. Add butter; pulse until mixture resembles coarse meal.


Whisk egg yolks and ice water in a small bowl. With machine running, add to flour mixture through feed tube; process until dough just holds together.


Turn out dough onto a work surface. Divide in half, and shape each portion into a disk. Wrap in plastic, and refrigerate 30 minutes (or up to 2 days).
On a lightly floured work surface, roll out 1 disk to a 10-inch round.

Fit into a 9-inch tart pan with a removable bottom; trim edges flush with rim. Refrigerate until firm, at least 1 hour (or up to 1 day). Reserve remaining dough for another use (it can be frozen up to 3 months).


Preheat oven to 375 degrees. Prick bottom of tart shell with a fork. Bake until golden brown, about 25 minutes. Let cool.


Lemon Curd

Ingredients

1/4 teaspoon unflavored gelatin
1 tablespoon cold water
6 large egg yolks
1 cup sugar
1/4 teaspoon salt
1/2 cup fresh lemon juice
1/2 cup (1 stick) unsalted butter, cut into tablespoons

Directions

Sprinkle gelatin over cold water in a small bowl, and let stand until softened, about 5 minutes.

Whisk together egg yolks, sugar, and salt in a large heatproof bowl. Gradually whisk in lemon juice. Place bowl over a saucepan of simmering water, and whisk constantly until mixture has thickened and registers 160 degrees on an instant-read thermometer. Whisk in gelatin mixture.


Remove from heat, and whisk in butter, a few pieces at a time, until smooth. Let cool, stirring occasionally. Prepare an ice-water bath. Place bowl of yolk mixture over bath, and stir until slightly thickened, about 2 minutes.

Assembling the Tart

Spread curd into crust; smooth top.

Dollop 3 tablespoons of creme fraiche in small drops on top. Using a wooden skewer or the tip of a knife, swirl creme fraiche into curd to create a marbleized effect. Refrigerate until firm, at least 2 hours (or up to overnight).