Since I probably won't be doing much food photography while preparing Thanksgiving dinner, I thought I'd just share my menu.
My husband and I are hosting a small Thanksgiving dinner - just his mom and a family friend. On the menu:
Cheese, crackers, and sliced persimmon from our farm share
Brined Turkey
A friend of ours made this for us last year and it was incredible. The recipe comes from Emeril Lagasse of the Food Network. We've never brined a turkey before, so this ought to be interesting.
New England Sausage, Apple, and Dried Cranberry Stuffing
From Epicurious. We've made this a few times now for Thanksgiving. It's wonderful.
Mashed Potatoes with Parsnips
Another item served up to us by friends. They made it with 3 potatoes and 6 parsnips, plus butter and a bit of half and half.
Green Beans
We'll keep those simple.
Candied Cranberry Sauce
It's from Food and Wine. The cranberries get cooked in a skillet with minimal water, so they stay whole. I've never made it, but it sounds good.
Pumpkin Pie with Gingersnap Crust, whipped cream, and candied pepitas
The pumpkin pie and pepitas come courtesy of Martha Stewart. The gingersnap crust idea came from the blog Martha Stewart Baking at Home. I love anything ginger, and the pepitas just look like a fun addition.
To drink, I'll be serving up some of these cocktails from Martha Stewart, made with rose cava and bay-infused simple syrup. We'll probably pop open a nice bottle of white from one of our recent trips to Napa.
And that's dinner. Hope everyone has a happy Thanksgiving!
Wednesday, November 26, 2008
Tuesday, November 25, 2008
Amazing Fall Gnocchi
I randomly stumbled upon Liz's Cooking Blog, where she had a divine looking recipe consisting of gnocchi, butternut squash, sage, and pine nuts. I had all these ingredients on hand the other night, plus I had bacon that I needed to use up. I decided to toss that in too. The result was to die for. Really. I want to make this weekly, it was that good.
1 medium butternut squash
4 cloves garlic, minced
Olive oil
Salt and pepper
Fresh sage leaves
1 package gnocchi
3/4 cup pine nuts, toasted
Grated Parmesan


Remove the butternut squash from the oven and add to the bacon and sage mixture.
With the heat still on low, add the gnocchi to the bacon and squash mixture. Mix together and add the pine nuts. Serve with grated parmesan cheese.

Ingredients
1 medium butternut squash
4 cloves garlic, minced
Olive oil
Salt and pepper
Fresh sage leaves
1 package gnocchi
3/4 cup pine nuts, toasted
Grated Parmesan
The original recipe called for an onion, which I didn't bother with, but I did up the garlic a bit. I probably used fewer pine nuts too.
Directions
Heat the oven to 375°. Cut the butternut squash in half and scoop out the strings and seeds the middle cavity. Flip the squash halves upside down and peel them. Cut the squash into 1-inch cubes. Toss with the garlic, a drizzle of olive oil, and salt and pepper. Mince about half of the fresh sage leaves and also toss with the squash.
Spread the squash mixture in a thin layer on a large baking sheet and roast for about 40 minutes or until the squash is soft.
As the squash finishes roasting, chop the bacon into one inch strips and fry in a deep skillet. Once the bacon starts getting crispy, push it to one side of the pan and toss whole sage leaves into the oil. Fry for about a minute, then turn the heat down to low and mix into the bacon. If there is too much oil in the pan at this point, drain off a couple tablespoons.
Remove the butternut squash from the oven and add to the bacon and sage mixture.
Heat salted pasta water to boiling and cook the gnocchi. Before draining the gnocchi, spoon a couple tablespoons of the water into the bacon and squash mixture and stir it, deglazing the pan.
Drain the gnocchi and set aside.
With the heat still on low, add the gnocchi to the bacon and squash mixture. Mix together and add the pine nuts. Serve with grated parmesan cheese.
Monday, November 24, 2008
Apple Cupcakes with Brown Sugar Buttercream
Yum.
These cupcakes were so good. They are pure Martha Magic. They are not too sweet and incredibly moist. They taste like apple cider. The buttercream works perfectly with them, though they would probably be good on their own with just a dusting of powdered sugar.
To Make the Cupcakes


 Remove cupcakes from tins; transfer to a wire rack; let cool completely.


Transfer to the clean bowl of an electric mixer. Beat on medium speed until fluffy and cooled, about 15 minutes. Raise speed to high; beat until stiff peaks form.


Makes 2 Dozen
Ingredients
2 1/4 cups all-purpose flour
1 teaspoon baking soda
1 teaspoon baking soda
1 teaspoon baking powder
2 teaspoons ground cinnamon
1/2 teaspoon ground nutmeg
1 teaspoon salt
1/2 cup (1 stick) unsalted butter, softened
2 cups sugar
2 large eggs
1 teaspoon pure vanilla extract
4 cups coarsely shredded apples, such as Macintosh (about 1 3/4 pounds)
2 teaspoons ground cinnamon
1/2 teaspoon ground nutmeg
1 teaspoon salt
1/2 cup (1 stick) unsalted butter, softened
2 cups sugar
2 large eggs
1 teaspoon pure vanilla extract
4 cups coarsely shredded apples, such as Macintosh (about 1 3/4 pounds)
I highly recommend shredding the apples first, then cleaning up before you do anything else. I shredded them while the butter and sugar were mixing and my kitchen looked like an orchard threw up on it. Even though I shredded the apples in my Cuisinart, the sticky juice and stray apple shreds got everywhere. While it won't affect the cupcakes, its better for your sanity.
Directions
Preheat oven to 350 degrees. Line 2 standard muffin tins with paper liners; set aside.
Whisk together flour, baking soda, cinnamon, nutmeg, and salt in a medium bowl; set aside.
Put butter and sugar into the bowl of an electric mixer fitted with the paddle attachment; mix on medium-high speed until pale and fluffy, about 5 minutes. Mix in eggs and vanilla. Reduce speed to low; mix in apples.
Add flour mixture; mix, scraping down sides of bowl as needed, until just combined.
Divide batter among lined cups, filling halfway; bake until tops are springy to the touch, 18 to 20 minutes. Actually, I filled mine more than halfway, but they still came out normal height. Maybe my muffin pans are smaller than Martha's. I'm not really sure.
Remove cupcakes from tins; transfer to a wire rack; let cool completely. To Make the Buttercream
Makes about 4 cups
Ingredients
4 large egg whites
1 cup packed light-brown sugar
1/4 teaspoon salt
1 1/2 cups (3 sticks) unsalted butter, room temperature, cut into tablespoons
4 large egg whites
1 cup packed light-brown sugar
1/4 teaspoon salt
1 1/2 cups (3 sticks) unsalted butter, room temperature, cut into tablespoons
In a heatproof bowl set over (not in) a pan of simmering water, whisk together egg whites, sugar, and salt. Cook, whisking constantly, until the sugar has dissolved and the mixture is warm to the touch.
Transfer to the clean bowl of an electric mixer. Beat on medium speed until fluffy and cooled, about 15 minutes. Raise speed to high; beat until stiff peaks form.
Reduce speed to medium-low; add butter, 2 to 3 tablespoons at a time, until fully incorporated.
This is where I started having problems. I've never made buttercream before, so I didn't realize how tempermental it could be. I learned after the fact that you can overwhip it, causing it to overheat and separate. Apparently if this happens, you can chill it and try rewhipping it. I didn't do this, because it tasted fine. It just was slightly lumpy and not as smooth and pretty as Martha's.
See?
If you see lumps, it is not butter that hasn't been fully incorporated. So stop whipping.
In any event, it still tasted fine, so I frosted the cupcakes. And to try to disguise the lumpy frosting, I sprinkled some pretty fall colored sugar on them. I definitely recommend storing these in the fridge because the frosting won't really hold up otherwise. You can let them come to room temperature before eating them though.
Sunday, November 23, 2008
Marbelized Lemon Tart with Sage Cornmeal Crust

As you know by now, I'm obsessed with putting herbs in desserts. And who doesn't love lemon tarts? Sage makes it seasonal. Though I'm sure this recipe would be equally good with rosemary or thyme.
The recipe comes from Martha Stewart. It's somewhat involved, so if you want to make it, plan ahead. I'll definitely make it again, but with two changes. First, I would not use coarse ground cornmeal, but something more finely ground. The crust had a nice flavor, but it was too grainy with the larger cornmeal flecks in it. Second, I would add a bit more sage. The flavor was there, but it wasn't very pronounced. Another teaspoon or two would do the trick.
Sage Cornmeal Crust
Makes enough for two 9-inch tarts
Ingredients
2 1/4 cups all-purpose flour, plus more for work surface
3/4 cup coarse yellow cornmeal (Don't do it! Use medium or finely ground.)
3 tablespoons sugar
1 tablespoon plus 1 teaspoon finely chopped fresh sage (more if you'd like a stronger sage taste)
1 1/2 teaspoons salt
1/2 teaspoon finely grated lemon zest
3/4 cup (1 1/2 sticks) cold unsalted butter, cut into small pieces
3 large egg yolks
5 tablespoons ice water
Directions
Pulse flour, cornmeal, sugar, sage, salt, and lemon zest in a food processor until combined. Add butter; pulse until mixture resembles coarse meal.

Whisk egg yolks and ice water in a small bowl. With machine running, add to flour mixture through feed tube; process until dough just holds together.

Turn out dough onto a work surface. Divide in half, and shape each portion into a disk. Wrap in plastic, and refrigerate 30 minutes (or up to 2 days).
On a lightly floured work surface, roll out 1 disk to a 10-inch round.
Fit into a 9-inch tart pan with a removable bottom; trim edges flush with rim. Refrigerate until firm, at least 1 hour (or up to 1 day). Reserve remaining dough for another use (it can be frozen up to 3 months).

Preheat oven to 375 degrees. Prick bottom of tart shell with a fork. Bake until golden brown, about 25 minutes. Let cool.

Lemon Curd
Ingredients
1/4 teaspoon unflavored gelatin
1 tablespoon cold water
6 large egg yolks
1 cup sugar
1/4 teaspoon salt
1/2 cup fresh lemon juice
1/2 cup (1 stick) unsalted butter, cut into tablespoons
Directions
Sprinkle gelatin over cold water in a small bowl, and let stand until softened, about 5 minutes.
Whisk together egg yolks, sugar, and salt in a large heatproof bowl. Gradually whisk in lemon juice. Place bowl over a saucepan of simmering water, and whisk constantly until mixture has thickened and registers 160 degrees on an instant-read thermometer. Whisk in gelatin mixture.
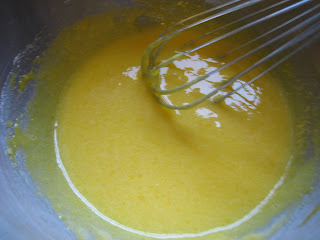
Remove from heat, and whisk in butter, a few pieces at a time, until smooth. Let cool, stirring occasionally. Prepare an ice-water bath. Place bowl of yolk mixture over bath, and stir until slightly thickened, about 2 minutes.
Assembling the Tart
Spread curd into crust; smooth top.
Dollop 3 tablespoons of creme fraiche in small drops on top. Using a wooden skewer or the tip of a knife, swirl creme fraiche into curd to create a marbleized effect. Refrigerate until firm, at least 2 hours (or up to overnight).

Friday, November 14, 2008
Butternut Squash Macaroni & Cheese
Yes, I realize this has become the cranberry and squash blog lately. I promise more variety soon. But there were two butternut squashes in my CSA box last week and this recipe looked really good.

Meanwhile, bring a large pot of water to a boil. Add noodles; cook until al dente according to package instructions, about 8 minutes. Drain, and transfer to a large bowl; stir in squash mixture, cheddar, ricotta, and 2 tablespoons Parmesan.


The recipe comes from Martha Stewart. As far as macaroni and cheese goes, this one is fairly light - there's no butter involved and it uses skim milk. The squash flavor is subtle, but it gives it a nice, creamy sweet taste. I didn't have the right pan, so mine was a little dry, though still very good. If you don't have a deep 9 inch square pan or some other medium size casserole dish, I'd recommend keeping the foil on top longer to keep the moisture in, using a little less pasta, or making more of the sauce.
Ingredients
1 small butternut squash (about 1 pound) , peeled, seeded, and cut into 1-inch cubes (about 3 cups)
1 cup homemade or low-sodium canned chicken stock, skimmed of fat
1 1/2 cups nonfat milk
Pinch of freshly grated nutmeg
Pinch of cayenne pepper
3/4 teaspoon coarse salt
Freshly ground black pepper
1 pound elbow macaroni
4 ounces extra-sharp cheddar cheese, finely grated (about 1 cup)
4 tablespoons Parmesan cheese, finely grated (1 ounce)
2 tablespoons fine breadcrumbs
1 teaspoon olive oil
Olive-oil cooking spray
1/2 cup part-skim ricotta cheese
Directions
Preheat oven to 375 degrees. Combine squash, stock, and milk in a medium saucepan; bring to a boil over medium-high heat. Reduce heat to medium; simmer until squash is tender when pierced with a fork, about 20 minutes. Remove from heat.
Mash contents of saucepan; stir in nutmeg, cayenne, and salt, and season with black pepper. Stir to combine.
Meanwhile, bring a large pot of water to a boil. Add noodles; cook until al dente according to package instructions, about 8 minutes. Drain, and transfer to a large bowl; stir in squash mixture, cheddar, ricotta, and 2 tablespoons Parmesan.
Lightly coat a 9-inch square baking dish (4 inches deep) with cooking spray. Transfer noodle mixture to dish. In a small bowl, combine breadcrumbs, remaining 2 tablespoons Parmesan, and oil; sprinkle evenly over noodle mixture.
I didn't have any bread crumbs, so I just sprinkled the Parmesan and a little bit more cheddar on top.
Cover with foil, and bake 20 minutes. Remove foil, and continue baking until lightly browned and crisp on top, 30 to 40 minutes more. Serve immediately.
Cranberry Sorbet
This sorbet is wonderful, though it didn't taste how I expected. The recipe on Epicurious said it was "Cranberry and Orange Thyme Sorbet." You know how obsessed I am with putting herbs in my desserts, so I was really excited to try this. Unfortunately, it has no thyme flavor whatsoever. I used lemon thyme, which may have been the problem. I'll definitely make it again, but next time I'll either omit the thyme completely, or use a woodier, stronger tasting thyme. It still tastes delicious and would probably be a nice alternative to heavy Thanksgiving desserts.


Ingredients
12 ounces fresh cranberries
1 cup sugar
1 1/2 cups water
Thinly sliced zest of 2 oranges (removed with a zester)
8 to 12 3-inch springs fresh thyme, such as orange balsam, lemon, or English thyme(1/2 ounce)
1 1/2 cups freshly squeezed orange juice
1 cup sugar
1 1/2 cups water
Thinly sliced zest of 2 oranges (removed with a zester)
8 to 12 3-inch springs fresh thyme, such as orange balsam, lemon, or English thyme(1/2 ounce)
1 1/2 cups freshly squeezed orange juice
I wasn't paying attention to the recipe closely enough and didn't have thin orange zests, but rather just removed the peel in a large chunk. So, my sorbet wasn't really orange-y tasting, but I liked it that way anyway. And, as I said above, I recommend using English thyme if you want the ice cream to pick up the herbal flavor, since the lemon thyme just isn't flavorful enough.
Directions
Bring the cranberries, sugar, water, and orange zest to a boil in a medium (3-quart) saucepan.
Partially cover the pan and boil until most of the cranberries pop, about 5 minutes. Stir in the thyme sprigs, remove from the heat, cover tightly, and steep for 30 minutes.
Pour the fruit mixture into a fine sieve set on top of a deep bowl. Stir and press down on the fruit with the back of a large spoon to extract as much juice and pulp as you can, leaving the skins and thyme behind in the sieve.
Refrigerate the strained mixture until thoroughly chilled. I actually just put the bowl in the fridge with the sieve right over it to let it chill, then pressed again. A fair amount more liquid came out after just letting it sit for a while.
Stir in the orange juice and then pour into an ice cream maker for 30-40 minutes. Freeze for a few more hours and there you have it. Cranberry (and orange and thyme) sorbet.
Wednesday, November 12, 2008
Warm Roasted Butternut Squash Salsa

I made this last week for my elections party, and named it "October Surprise." While the official recipe name is a salsa, it really is more like a bean dip, and it was so delicious that I would probably just eat a bowl of it, like chili.
The recipe comes from the Washington Post. (No, I won't give up east coast newspapers ever. The San Francisco Chronicle sucks.)
Ingredients
1 1/2 pounds butternut squash, peeled, seeded and cut into 1/2-inch chunks (may substitute 3/4 pound prepped butternut squash cubes)
3 tablespoons extra-virgin olive oil
Salt
Freshly ground black pepper
1 medium onion, cut into small dice
1 medium red bell pepper, stemmed, seeded and cut into 1/4-inch dice
2 medium cloves garlic, minced
1 small jalapeño pepper, stemmed, seeded and minced
14 to 15 ounces canned, diced no-sodium tomatoes, drained
15 to 19 ounces canned pinto beans, drained and rinsed
2 tablespoons finely chopped cilantro leaves
1/4 cup shelled pumpkin seeds, toasted
The recipe also called for a zucchini, diced up, but that sounded disgusting to me, so I left it out. Who wants slimy, watered down zucchini in their salsa/chili? Not me.
The recipe is a labor intensive one, as it involves a lot of chopping, so I highly recommend buying the pre-diced squash, as it will really cut down on prep time. You'll still have to chop it even smaller, but it does save time.

Directions
Position a rack in the middle of the oven; preheat to 400 degrees. Lightly grease a rimmed baking sheet with nonstick cooking oil spray.
Position a rack in the middle of the oven; preheat to 400 degrees. Lightly grease a rimmed baking sheet with nonstick cooking oil spray.
Spread the squash cubes in a single layer on the baking sheet. Drizzle with 1 tablespoon of the oil and toss to coat evenly. Season lightly with salt and pepper. Roast for about 25 minutes, until slightly browned and fork-tender.
When the squash has about 15 minutes of roasting time to go, heat the remaining 2 tablespoons of oil in a large skillet over medium-high heat. Add the onion, bell pepper, garlic and jalapeño; cook for about 8 minutes, stirring occasionally, until the onion is golden.
Add the tomatoes, beans, and cilantro (plus the zucchini if you are using it); cook for about 5 minutes, stirring once or twice.
Add the roasted squash and stir to incorporate; cook for 5 minutes. Taste and adjust seasoning as needed.
At this point, the salsa can be transferred to a slow cooker to keep warm, or it can be cooled completely, covered and refrigerated for up to 3 days. Just before serving, sprinkle the pumpkin seeds on top of the salsa.

Monday, November 3, 2008
I am the love child of Martha Stewart and Chuck Todd

For my elections return party tomorrow night, I embraced my inner political nerd by baking cookies in the shape of swing states. I found the cookie cutters for sale online, and followed Martha's sugar cookie recipe, which The Good Wife used a few weeks ago for her gorgeous fall sugar cookies.
The recipe was fairly straight forward and I had a lot of fun baking these. Since it's a basic cookie recipe, I'll spare you the baking details and skip ahead to the finished product.
The Bellweather State

Is that a Florida cookie, or are you just happy to see me?

Real and Fake Virginia

So many undecided voters...

Later this week, I'll post a few other recipes from my party. In the mean time: GO OBAMA! And NO ON PROP 8!
Subscribe to:
Comments (Atom)


